
There’s something magical about a perfectly made crispy chicken sandwich—golden on the outside, juicy on the inside, and stacked with just the right crunch, spice, and sauce. It’s comfort food with character, the kind of sandwich that can turn an ordinary lunch into something special.
This recipe takes everything people love about a fried chicken sandwich—flavor, texture, and nostalgia—and gives it a polished, easy-to-follow upgrade. While many recipes stop at “fry and serve,” we’ll go further: exploring why each step matters, how to keep your chicken juicy, and how to make it taste restaurant-worthy without overcomplicating the process.

Why This Crispy Chicken Sandwich Stands Out
Many fried chicken sandwich recipes online are good—but they often leave out essential tips that make the difference between average and unforgettable. This version goes beyond the basics, combining technique, timing, and taste science for the ultimate bite.
● Tender Inside, Crispy Outside – The secret is a light cornstarch-flour coating and a well-timed fry at 325°F, ensuring crispness without drying the chicken.
● Flavor Infusion – A dill pickle brine doesn’t just season; it tenderizes and builds deep flavor into every fiber.
● Perfectly Balanced Layers – Creamy mayo, crunchy lettuce, tangy pickles, and buttery toasted buns add texture harmony.
● Customizable – This recipe welcomes tweaks—from hot honey drizzles to kimchi toppings—without losing its identity.
Key Terms Explained
Brining:
A soaking method that infuses meat with salt and flavor while improving moisture retention. Using dill pickle brine adds acidity and savory depth without extra steps.
Buttermilk:
A slightly tangy liquid that helps tenderize chicken and gives breading a better grip. Always use real buttermilk for a consistent texture.
Cornstarch:
A fine starch that, when mixed with flour, makes the coating lighter and crispier. It’s the unsung hero of perfect crunch.
Double Dredge:
A technique where chicken is dipped twice in wet and dry mixtures to create an extra-thick, craggy crust that stays crisp longer.
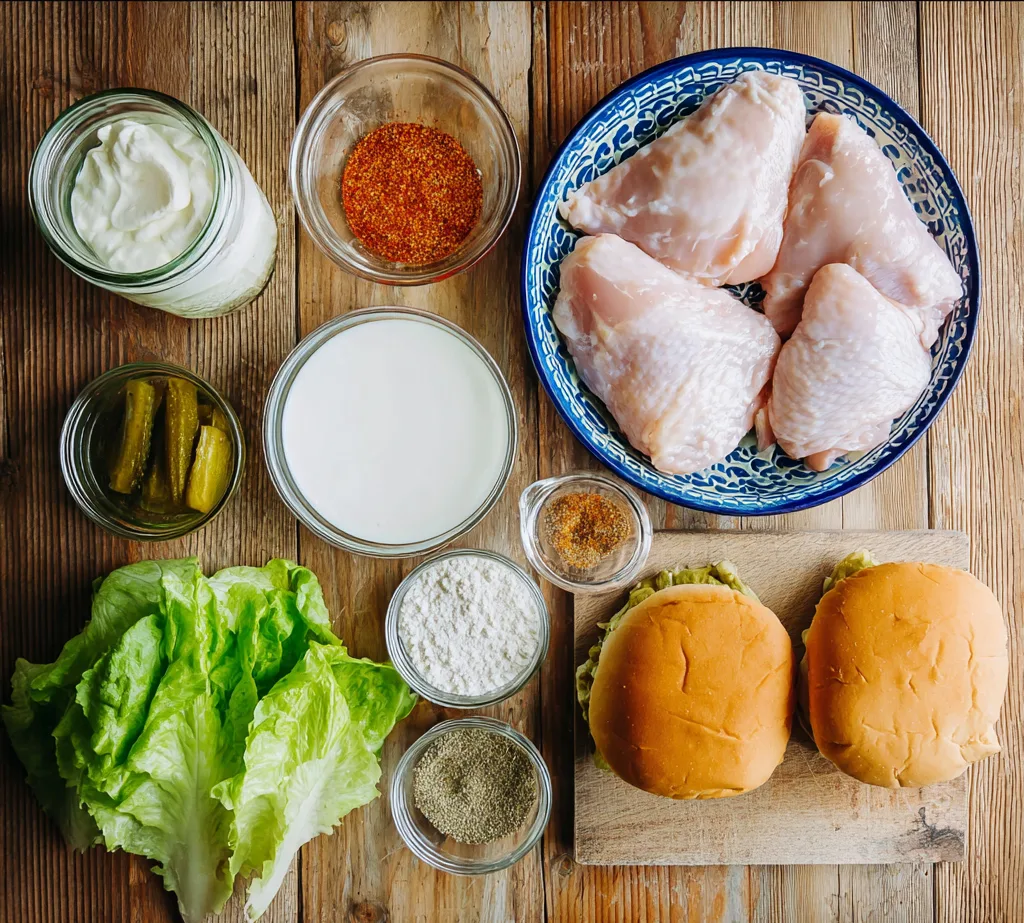
Ingredients and Their Roles
| Ingredient | Quantity | Purpose |
|---|---|---|
| Boneless, skinless chicken thighs | 4 pieces | Juicy base for the sandwich |
| Dill pickle brine | ½ cup | Tenderizes and seasons |
| Buttermilk | 1 cup | Helps coating adhere and adds tang |
| All-purpose flour | 1 cup | Forms the base of the breading |
| Cornstarch | ¼ cup | Makes coating crisp and light |
| Onion powder | 1 tbsp | Adds a sweet, savory undertone |
| Garlic powder | 1 tbsp | Builds deep aroma |
| Paprika | 1 tbsp | Adds color and subtle smokiness |
| Fine sea salt | 1 tsp | Enhances flavor |
| Black pepper | 1 tsp | Balances seasoning |
| Cayenne pepper | ¼ tsp | Adds a gentle kick |
| Safflower oil | For frying | High smoke point, neutral flavor |
| Brioche or potato rolls | 4 | Soft yet sturdy sandwich base |
| Salted butter | 4 tbsp | For toasting buns |
| Kewpie mayonnaise | ½ cup | Creamy and tangy spread |
| Dill pickle slices | 1 cup | Adds crunch and acidity |
| Shredded romaine lettuce | 1 cup | Freshness and texture |
| Optional: cheese, tomato, hot honey | As desired | Flavor customization |
Equipment Needed
● Mixing Bowls – For brine, buttermilk, and coating mixtures.
● 12-inch Cast Iron Skillet or Dutch Oven – Holds consistent heat for frying.
● Tongs and Wire Rack – For flipping and draining fried chicken.
● Instant-read Thermometer – Ensures chicken reaches 165°F safely.
● Paper Towels – To absorb excess oil and keep the crust crisp.
Step-by-Step Directions
Step 1: Brine the Chicken
Place the chicken thighs in a shallow dish or zip bag. Pour over dill pickle brine and let marinate for at least 1 hour or up to 8 hours in the refrigerator. This step ensures juicy, flavorful meat.
Step 2: Prepare the Coatings
In one bowl, pour the buttermilk. In another, whisk together flour, cornstarch, and all seasonings. The combination of dry and wet mixes ensures a crunchy crust.
Step 3: Heat the Oil
Pour safflower oil into a skillet or Dutch oven to about 2 inches. Heat to 350°F, knowing it will drop slightly when chicken is added. Maintaining 325°F during frying is ideal for perfect browning.
Step 4: Coat the Chicken
Dip each thigh in buttermilk, allowing excess to drip off. Then dredge in the flour mixture, pressing gently for an even coat. For an extra-crispy crust, repeat the process once more for a “double dredge.”
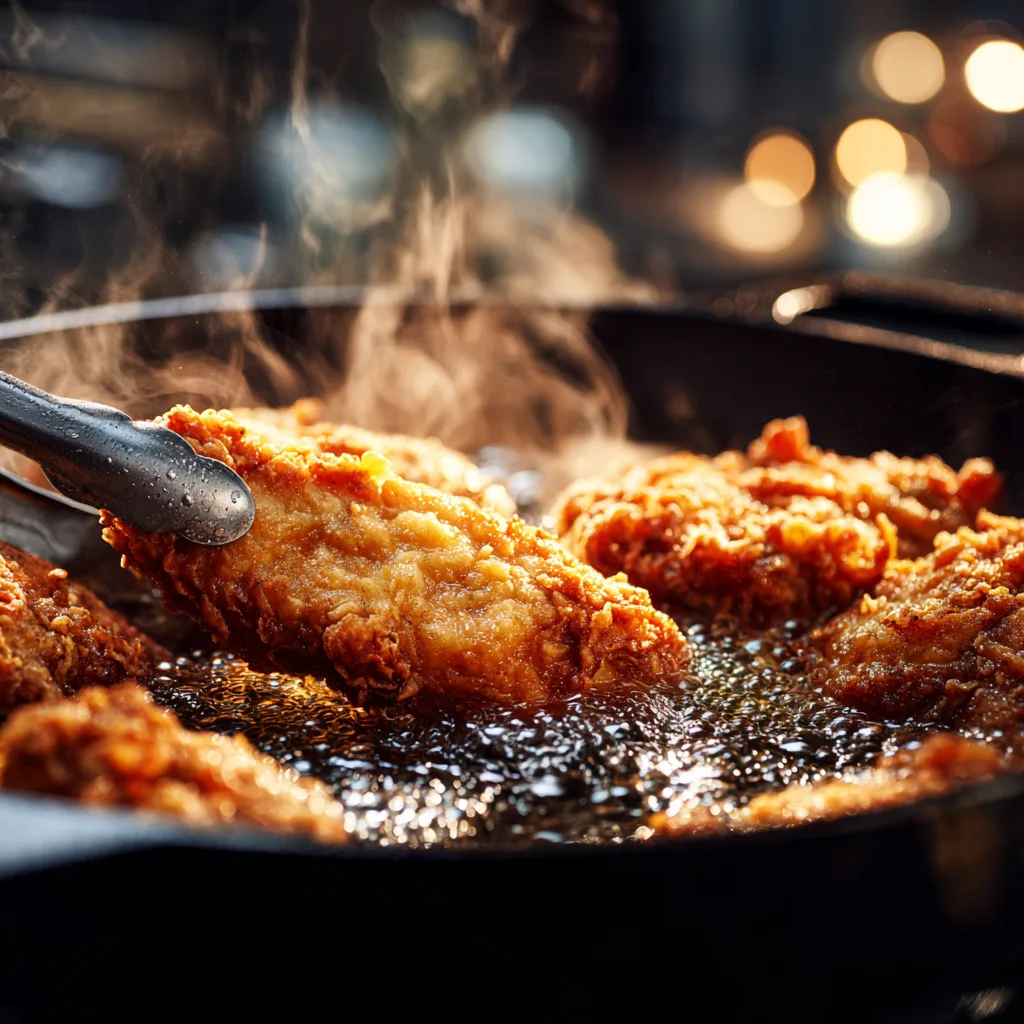
Step 5: Fry to Golden Perfection
Lower the chicken pieces carefully into the hot oil. Fry for 6–8 minutes per side, turning occasionally, until golden brown and cooked through to 165°F internal temperature. Transfer to a rack lined with paper towels to drain.
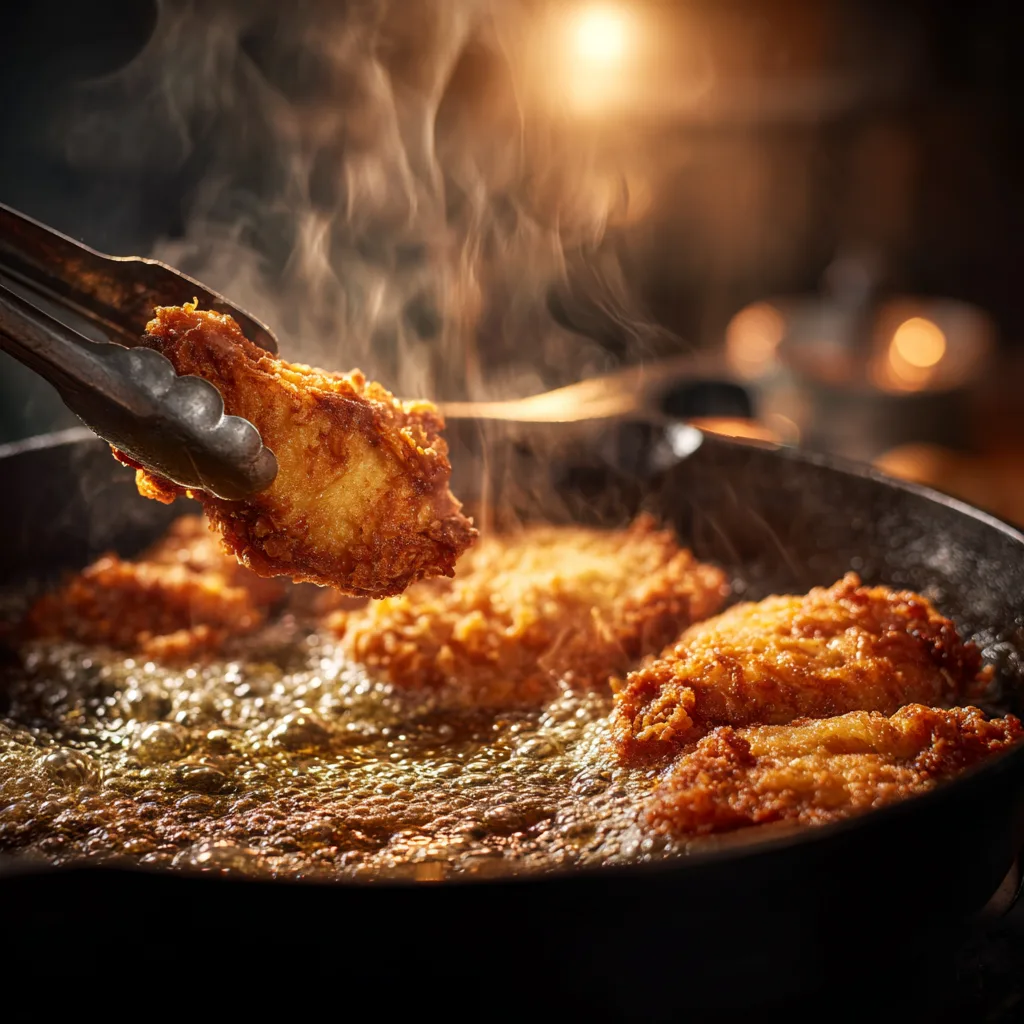
Pro Tip – The Science of Crunch
Ever wonder why some fried chicken loses its crispiness within minutes? The secret lies in steam management.
When hot food sits directly on paper towels, trapped steam softens the crust. Elevate fried chicken on a wire rack to let air circulate beneath, keeping it perfectly crunchy even after resting.
Toasting and Assembling the Sandwich
A truly great crispy chicken sandwich depends as much on its layers as its fry. The right bun, the right texture, and the right balance of condiments transform this dish from casual to crave-worthy.
Step 6: Toast the Buns
Spread a thin layer of salted butter on the inside of each bun half. Heat a skillet or griddle over medium heat and toast until golden and crisp on the cut side. This prevents sogginess and adds buttery flavor that complements the fried chicken.
Step 7: Build the Layers
Spread Kewpie mayonnaise (or your favorite mayo) on both toasted halves.
Layer in this order for the best texture and taste:
● Bottom bun: Mayo, pickle slices, and a bed of shredded lettuce.
● Middle: Fried chicken thigh—still warm, with a golden crust.
● Top bun: A little more mayo or a drizzle of hot honey if you like sweetness with spice.
Press gently and let the sandwich rest for one minute before serving. This quick pause lets the steam escape while the flavors settle into balance.
Serving Suggestions
Pair your crispy chicken sandwich with:
● Sweet potato fries or waffle fries for a sweet-savory balance.
● Coleslaw with apple cider vinegar dressing to cut through richness.
● Homemade dill pickles or a light cucumber salad for freshness.
● Spicy aioli or ranch dip for those who love extra sauce.
You can also serve it as sliders for parties or stack it club-style for a hearty weekend meal.
Recipe Variations You’ll Love
The beauty of a crispy chicken sandwich lies in its versatility. Once you master the base, you can remix it endlessly.
1. Buffalo Style
Toss the fried chicken in a mix of melted butter and Frank’s RedHot sauce. Add blue cheese crumbles or ranch drizzle for a bold kick.
2. Nashville Hot Honey
Brush the chicken with spicy honey butter and top with bread-and-butter pickles. Sweet, smoky, and addictive.
3. Pimento Cheese Melt
Swap mayo for a layer of homemade pimento cheese. Add tomato slices and crispy bacon for Southern flair.
4. Korean-Inspired Crunch
Glaze fried chicken in gochujang sauce, top with kimchi, and add a slice of American cheese. The contrast of heat and tang is incredible.
5. Classic Deluxe
Add crisp lettuce, ripe tomato slices, and a slice of cheddar for a nostalgic diner-style sandwich.
Storage and Reheating Tips
● Storage: Keep leftover chicken in an airtight container in the fridge for up to 5 days.
● Reheat: Place on a wire rack in a 350°F oven for 10–12 minutes to re-crisp the coating.
● Avoid microwaving: It makes the crust soggy.
● Make-ahead tip: You can fry the chicken a few hours before serving, then warm it in the oven before assembling the sandwiches.

Common Mistakes and How to Avoid Them
● Skipping the brine: Without brine, chicken tends to dry out and lacks deep flavor.
● Overcrowding the pan: It drops the oil temperature and leads to a soggy coating. Fry in small batches.
● Using cold chicken: Let it sit at room temperature for 15 minutes before frying for even cooking.
● Neglecting the bun: A soft, buttery toasted bun is key to texture contrast.
Nutrition Facts (Per Sandwich)
| Nutrient | Amount | Benefit |
|---|---|---|
| Calories | ~680 kcal | Energy-dense, hearty meal |
| Protein | 46g | Builds and repairs muscle |
| Carbohydrates | 34g | Provides sustained energy |
| Fat | 38g | Adds richness and satiety |
| Fiber | 2g | Supports digestion |
| Sodium | 970mg | Balanced flavor level |
Summary
This crispy chicken sandwich brings together everything that makes classic comfort food unforgettable—crunch, flavor, and satisfaction. It’s crispy on the outside, juicy inside, with a buttery toasted bun that ties it all together.
Whether you love the classic version or prefer it with a twist like buffalo, hot honey, or kimchi, this recipe adapts beautifully. Once you’ve tasted that first bite of golden crunch, you’ll never look back at fast-food versions again.
Crispy Chicken Sandwich
Ingredients
Method
- Brine: Place chicken in a shallow dish or zip bag and cover with pickle brine. Chill for at least 1 hour (or up to 8 hours).
- Prepare Coating: In one bowl, pour buttermilk. In another, mix flour, cornstarch, and all spices.
- Heat Oil: Pour oil into a skillet or Dutch oven about 2 inches deep. Heat to 350°F (175°C).
- Coat Chicken: Dip chicken into buttermilk, then dredge in flour mix. Repeat once for an extra crispy crust.
- Fry: Cook 6–8 minutes per side at 325°F, until golden brown and internal temp reaches 165°F. Drain on a wire rack.
- Toast Buns: Spread butter on buns and toast in a skillet until golden.
- Assemble: Spread mayo on buns, add lettuce, pickles, and chicken. Top and serve warm.
Notes
- Use chicken thighs for juicier results—they hold up better than breasts.
- Brining is key for flavor and tenderness.
- Reheat leftovers in the oven (not microwave) to keep the crust crisp.
- Try variations like buffalo-style or hot honey glaze for extra flavor.
Nutritional Facts (Per Sandwich)
Calories: 680 kcalProtein: 46g
Fat: 38g
Carbs: 34g
Fiber: 2g
Sugar: 2g
Sodium: 970mg

